Table of Contents
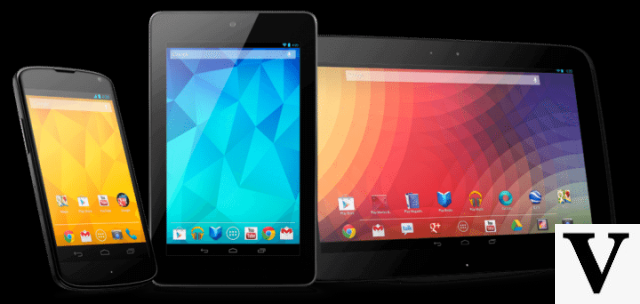
This week, the Google released the update images Android 5.0 (Lollipop) for the other devices on the line Nexus (Nexus 4, Nexus 5, Nexus 7, Nexus 10). The novelty should make life easier for many people, including features that only exist in this new version of the system. Among them are more efficient management of battery and creation of multiple users for access on smartphones and tablets.
Those who don't want to wait for the automatic update – which should happen gradually – can do the manual installation, through this tutorial. Just follow the steps below:
Important:
- Tutorial recommended for experienced users only. THE Techlifers is not responsible for damages caused to your device in carrying out this procedure. Follow it at your own risk, ok?
- It is necessary that your device has ROOT access and custom recovery installed, before starting this update (more information in this research);
Downloadable Files:
Android 5.0 (choose according to your smartphone):
- Nexus 4 (occam) KTU84P to (not yet available);
- Nexus 5 (hammerhead) by KTU84P guidance on LRX21O;
- Nexus 5 (hammerhead) by KTU84Q guidance on LRX21O;
- Nexus 7 (2013) Wi-Fi (razor) KTU84Q guidance on LRX21P;
- Nexus 7 (2013) LTE (raz.org) KTU84P to (not yet available);
- Nexus 7 (2012) Wi-Fi (nakasi) KTU84P guidance on LRX21P;
- Nexus 7 (2012) 3G (powered) de KTU84P to (not yet available);
- Nexus 9 (flying) LRX21L guidance on LRX21Q;
- Nexus 10 (mantaray) from KTU84P guidance on LRX21P;
Other:
- Minimal ADB and Fastboot;
- Developer Options;
- Drivers;
Installation Tutorial:
After fulfilling the above requirements, let's start the tutorial:
- Please download for free of the installation file update 5.0, indicated above, choosing only the one that corresponds to your smartphone or tablet;
- Then download and extract the file “Minimal ADB and Fastboot” to a folder created on your computer (“C: ADB");
- save the file from update 5.0 in this same folder;
- Then download the app "Developer Options” on your device. When starting it, click on the “confirm” option if the “USB debugging” is selected;
- Now do the download for free of the file "Drivers” and install them on your computer (if you haven't already done so in the past);
- Connect your device using the USB cable to the computer and wait for it to be recognized;
- Now, open the Windows command prompt (cmd) and locate in it the folder where the Minimal ADB and Fastboot (“C:ADB”);
- Inside it, write: adb reboot bootloader
- Press “Enter”, wait for the process to finish;
- Turn off the phone, use this sequence to put it in fastboot mode;
- Navigate the menu using the “volume +” key;
- Select with the “power” key,
- Choose the option “apply update from adb” and open to “power” tecla;
- In the window "cmd" type it : adb sideload nomedoarquivo.zip
- Wait for the installation to complete and that's it!
Did you like the tutorial? Comment in the fields below!